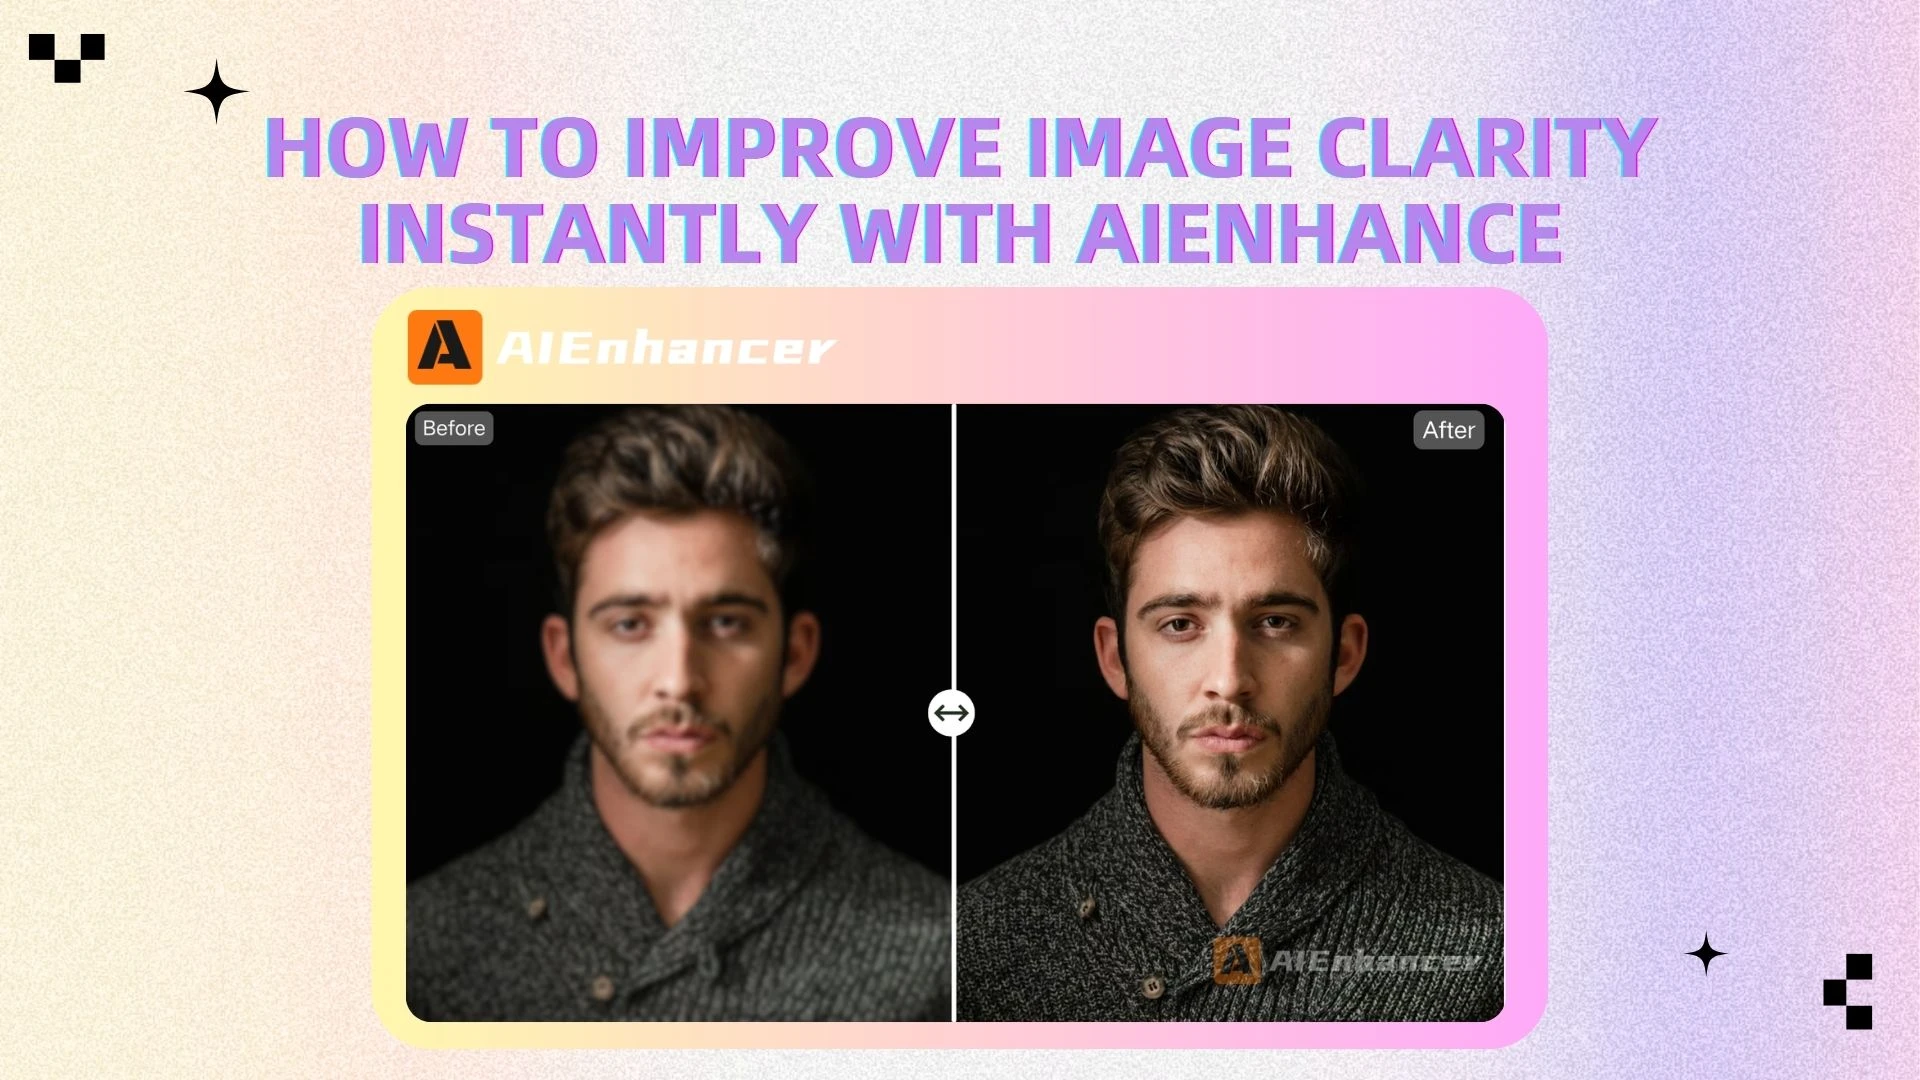
How to Improve Image Clarity Instantly with AIEnhance
Introduction
We’ve all been there: You capture a once-in-a-lifetime moment, only to find it’s a blurry mess on your screen. Maybe you tried to zoom in and everything fell apart. Or perhaps the image just looked dull and lifeless, no matter how you adjusted it.
These are common frustrations. Traditional photo editing tools can fix some of these issues, but they often require time, experience, and technical knowledge. For many people, that learning curve becomes a barrier.
Today, things are different. With the rise of AI-powered tools like AIEnhancer, improving image clarity is no longer complicated. In just a few seconds, you can transform a low-quality photo into a sharp, visually appealing image.
In this guide, we’ll walk through how to identify clarity issues, how an AI photo enhancer works, and how you can use an AI image editor to create professional-quality visuals effortlessly.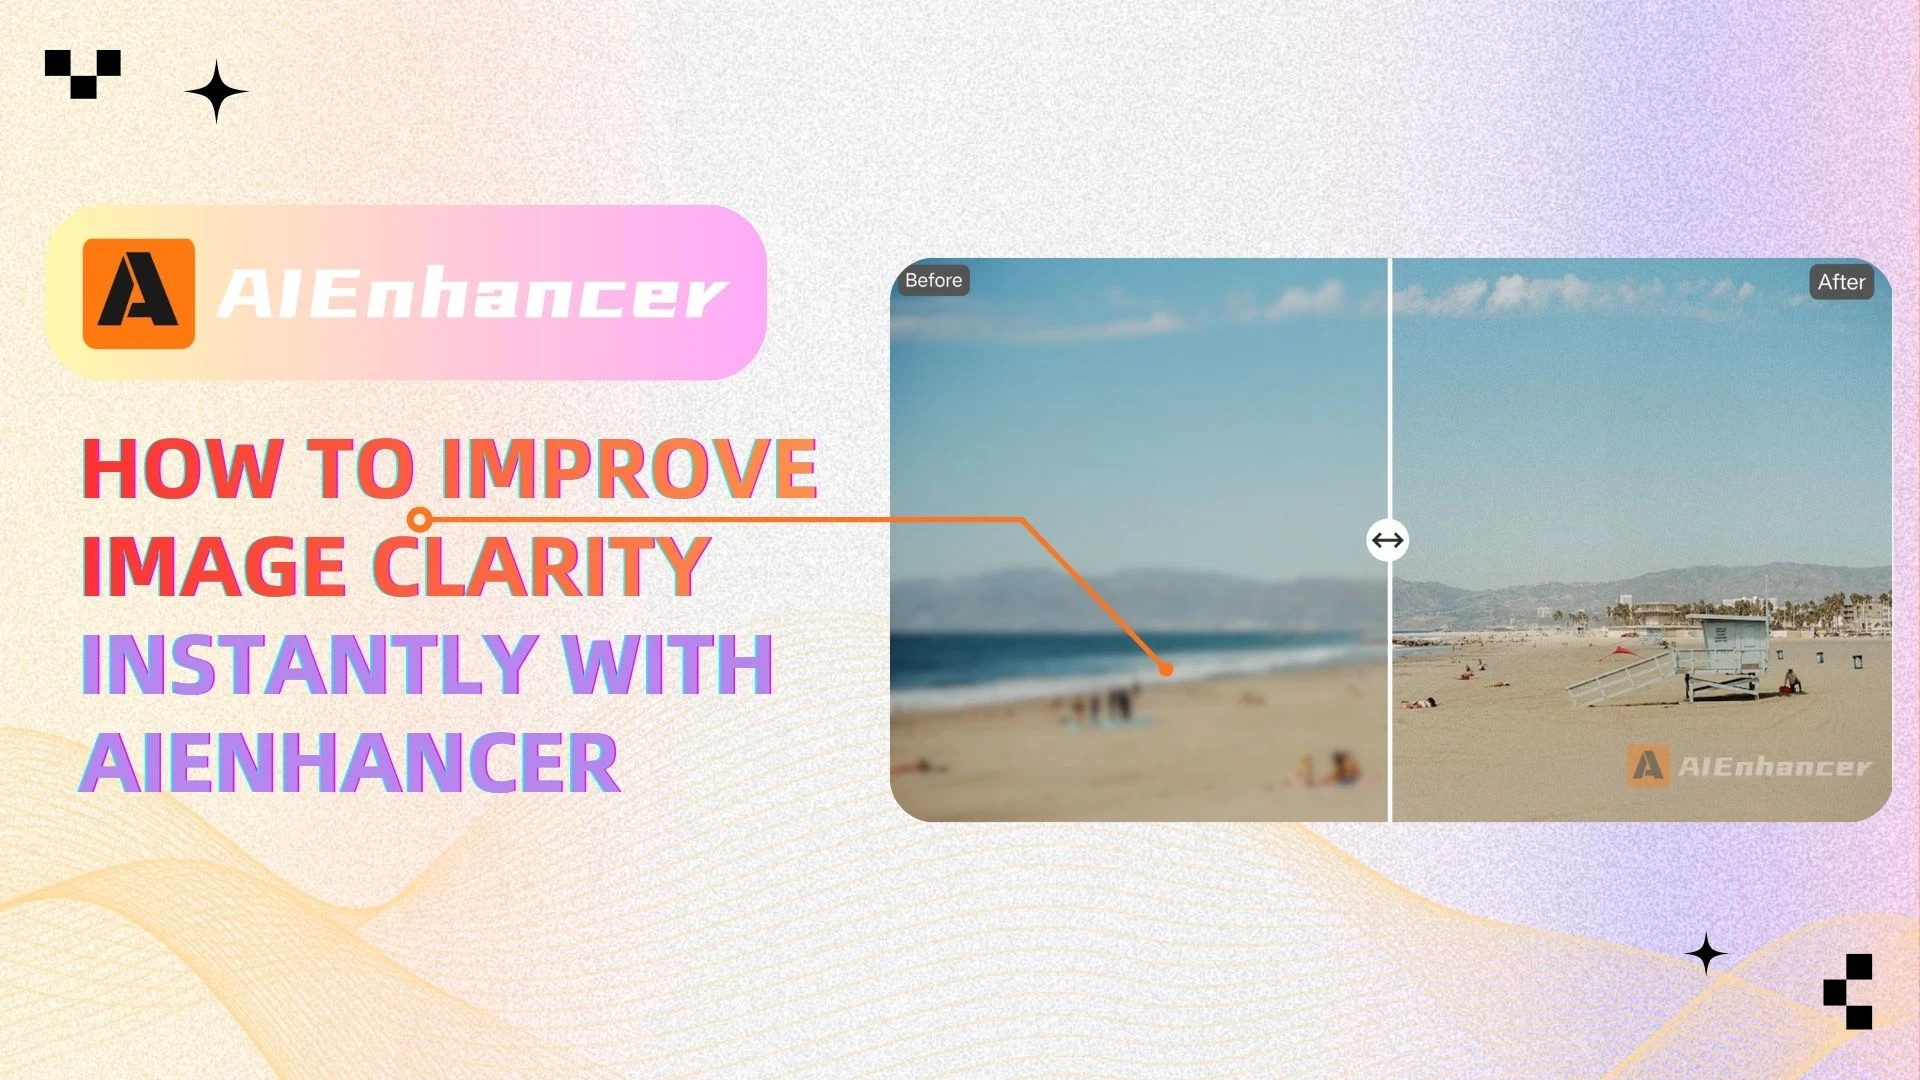
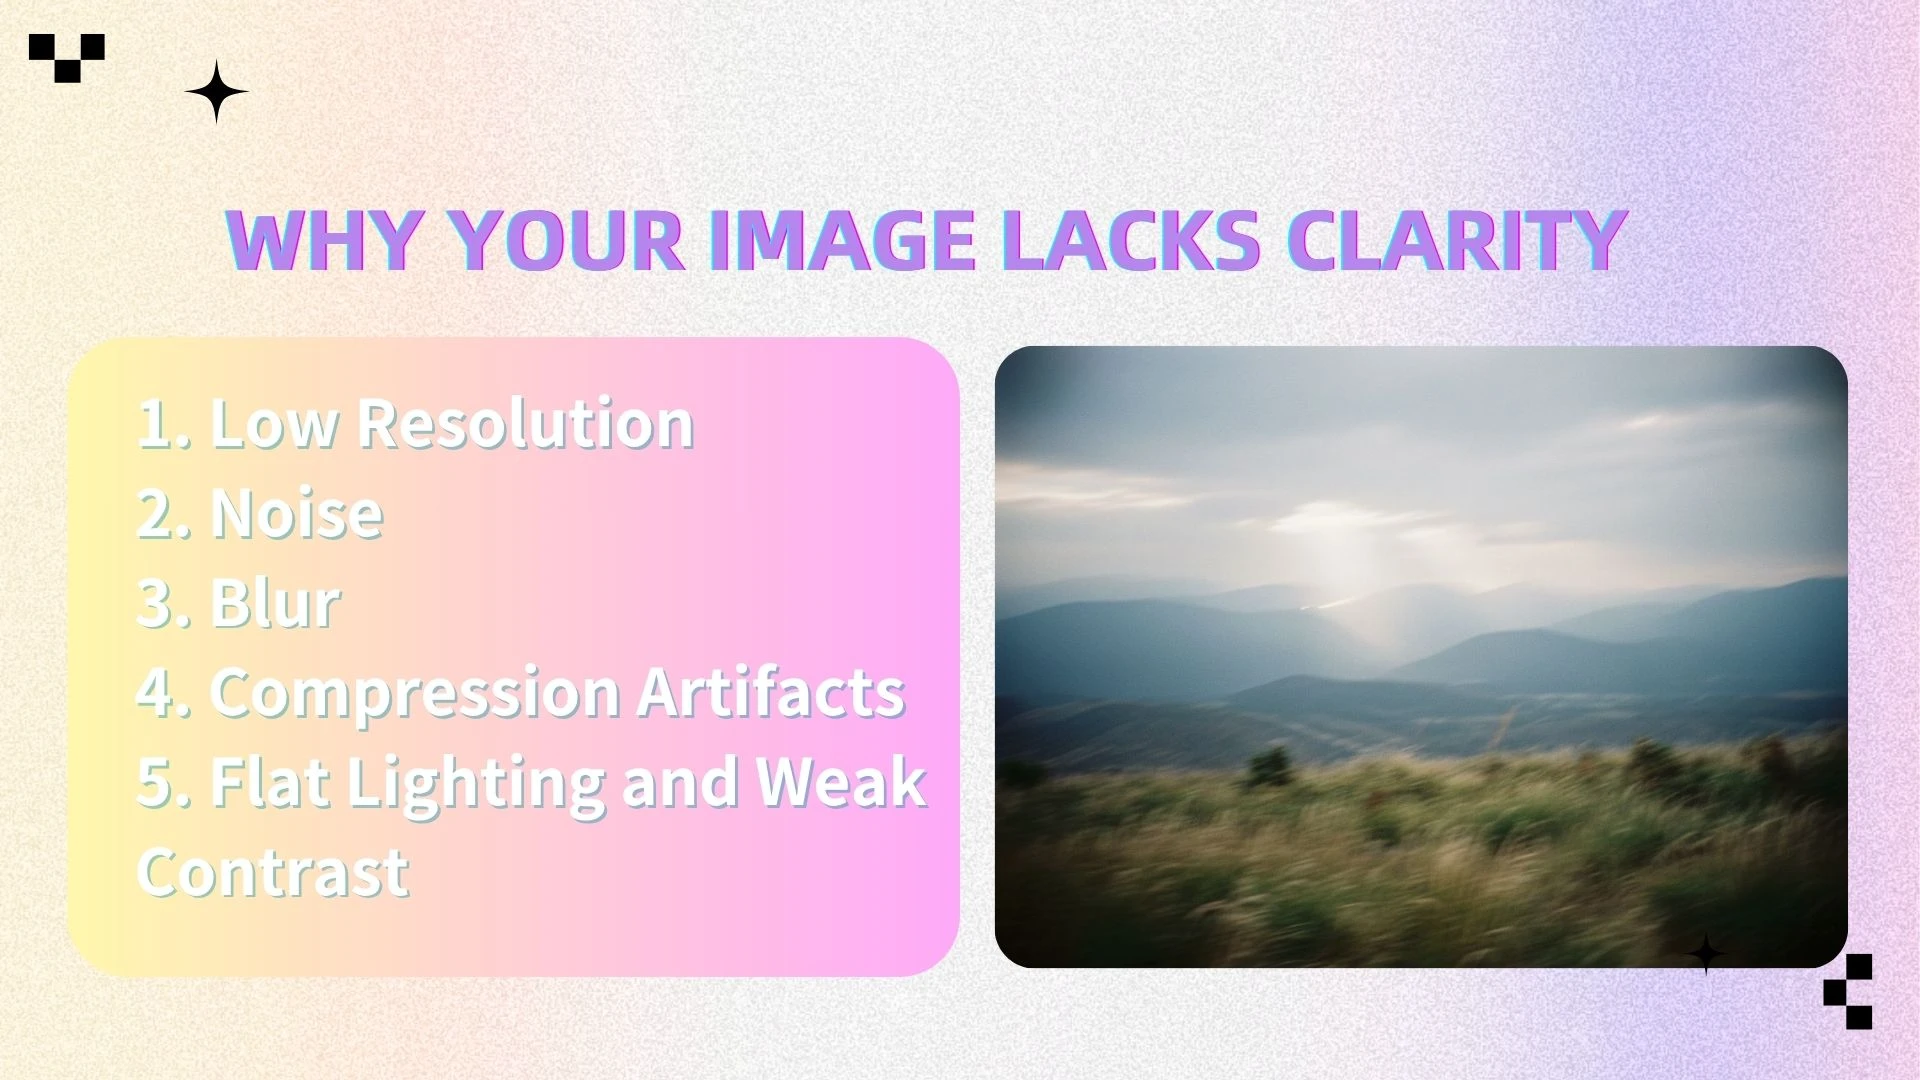
Why Your Image Lacks Clarity
Before improving an image, it’s important to understand what’s causing the problem. Image clarity issues usually come from a few key factors.
1. Low Resolution
Low-resolution images contain fewer pixels, which means less detail. When you enlarge them, they often appear blurry or pixelated. An AI photo enhancer can increase resolution by intelligently adding new pixels and reconstructing missing details, rather than simply stretching the image.
2. Noise
Noise appears as grainy or speckled patterns, especially in low-light photos. It reduces overall sharpness and makes images look unclean. AI-based denoising tools analyze patterns in the image and remove unwanted noise while preserving important details.
3. Blur
Blur can come from camera shake, subject movement, or poor focus. This results in soft edges and loss of detail. AI sharpening tools can restore edges and enhance fine textures, making the image appear clearer.
4. Compression Artifacts
Images saved in compressed formats like JPEG may show blocky distortions or broken edges. An AI image editor can detect and repair these artifacts, restoring a more natural look.
5. Flat Lighting and Weak Contrast
Flat lighting or incorrect exposure can make images look dull and unclear. Adjusting brightness, contrast, and dynamic range helps bring out details and improve clarity.
Most clarity issues fall into four categories: resolution, sharpness, noise, and color. The good news is that all of these can be significantly improved using AI tools.
How AI Improves Image Clarity
AI image enhancement has transformed how we improve photo quality. Unlike traditional tools that rely on manual adjustments or basic filters, AI systems learn from vast datasets to understand textures, edges, lighting, and fine details. AI does more than tweak pixels. It doesn't just "guess"; it intelligently reconstructs textures and edges by learning from millions of high-res examples.
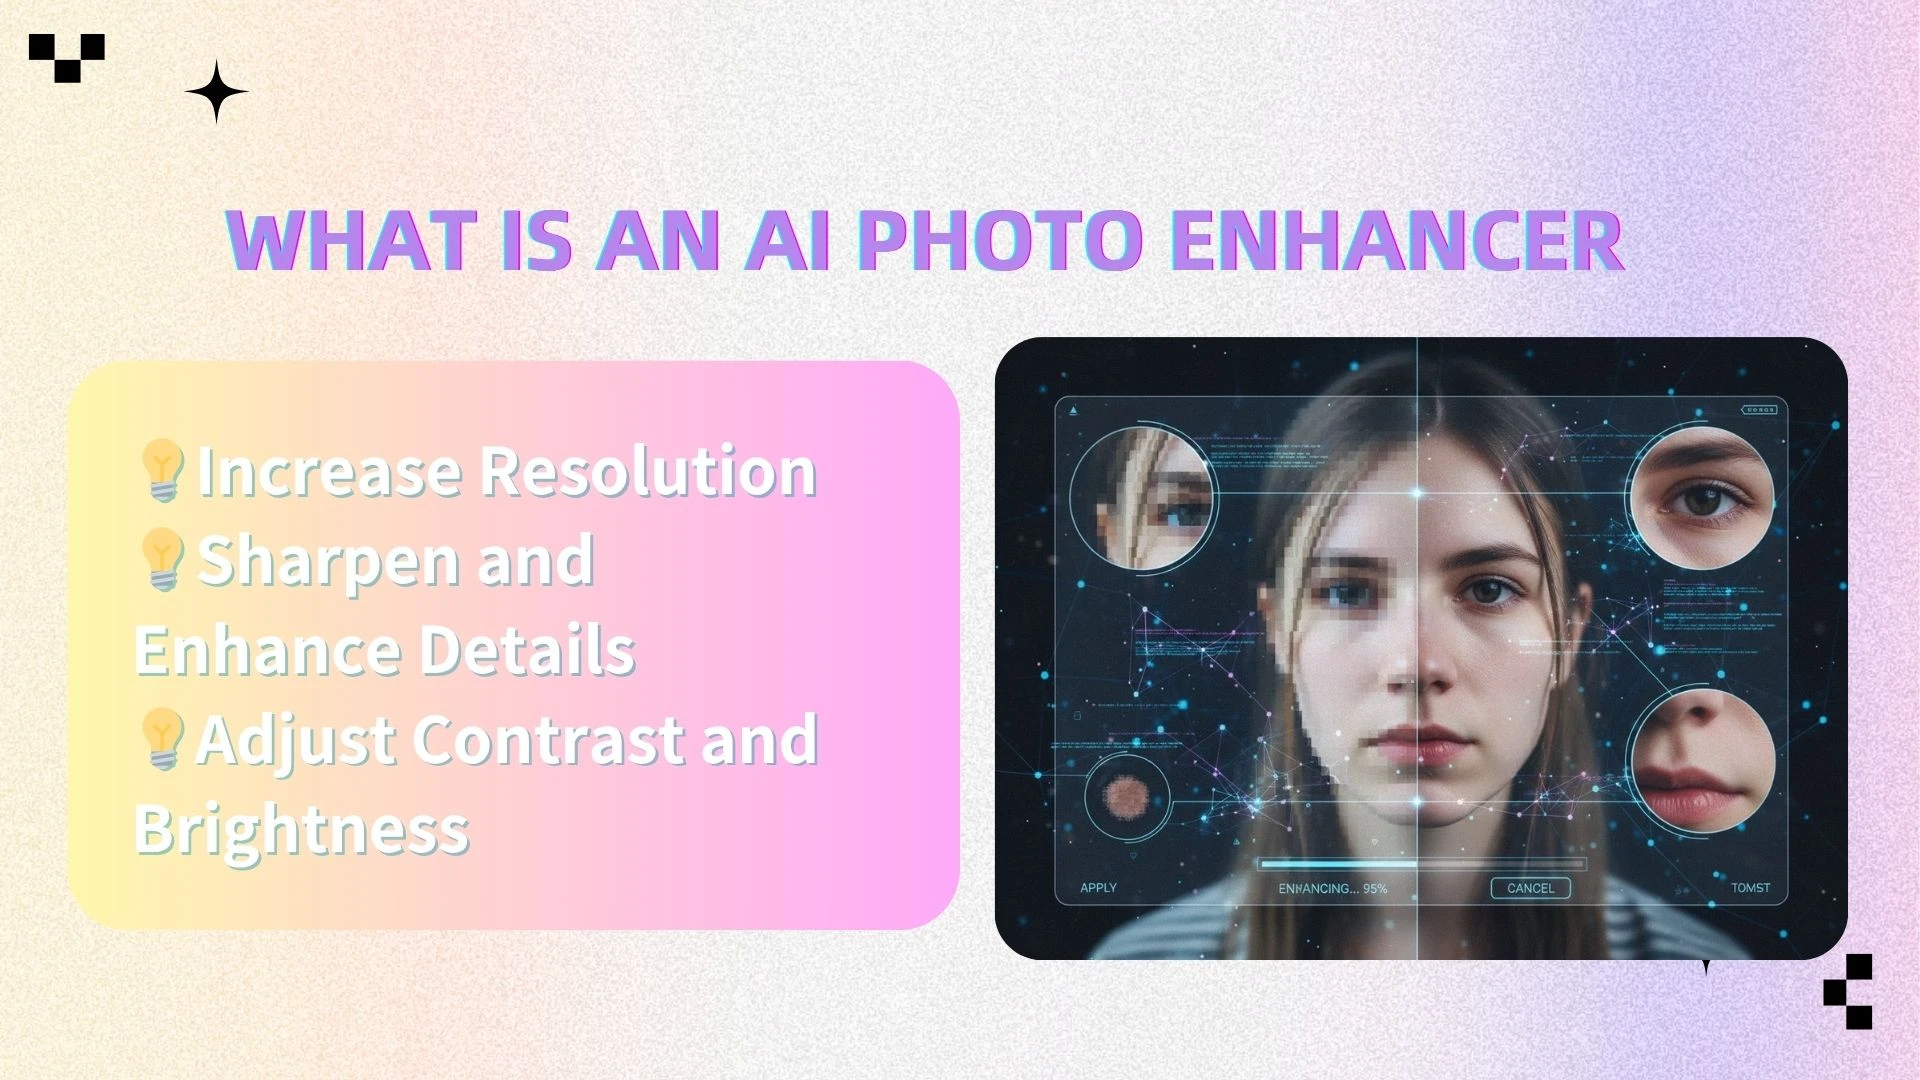
What Is an AI Photo Enhancer
An AI photo enhancer is a tool designed to automatically improve image clarity and quality with minimal user input. It goes beyond simple upscaling or sharpening—instead, it rebuilds the image using learned patterns from high-resolution data.
For example, when you upload a blurry or low-resolution image, the AI doesn’t just stretch it. It predicts what the missing details should look like, restoring textures, refining edges, and improving overall sharpness.
That’s why it works particularly well for:
Low-resolution images that need enlargement
Old or compressed photos with lost details
Images affected by noise or blur
Core Capabilities of AI Enhancement
Increase Resolution
One of the most important features of an AI photo enhancer is intelligent upscaling. Traditional resizing methods often lead to pixelation and loss of detail. AI, however, generates new pixels based on learned image structures, allowing you to enlarge images while preserving clarity.
This is particularly useful for printing, e-commerce images, or any scenario where high resolution is essential.
Sharpen and Enhance Details
Blurred edges and soft textures are common issues in low-quality images. AI enhancement tools detect these areas and selectively sharpen them, restoring fine details such as hair, fabric textures, or architectural lines.
Unlike traditional sharpening, which can create harsh or artificial results, AI ensures that the enhancement remains natural and balanced.
Adjust Contrast and Brightness
Clarity is not just about sharpness—it’s also about visibility. Poor lighting can hide important details and make an image look flat.
AI automatically adjusts brightness, contrast, and dynamic range to bring out depth and definition. This helps reveal subtle details that would otherwise remain unnoticed.
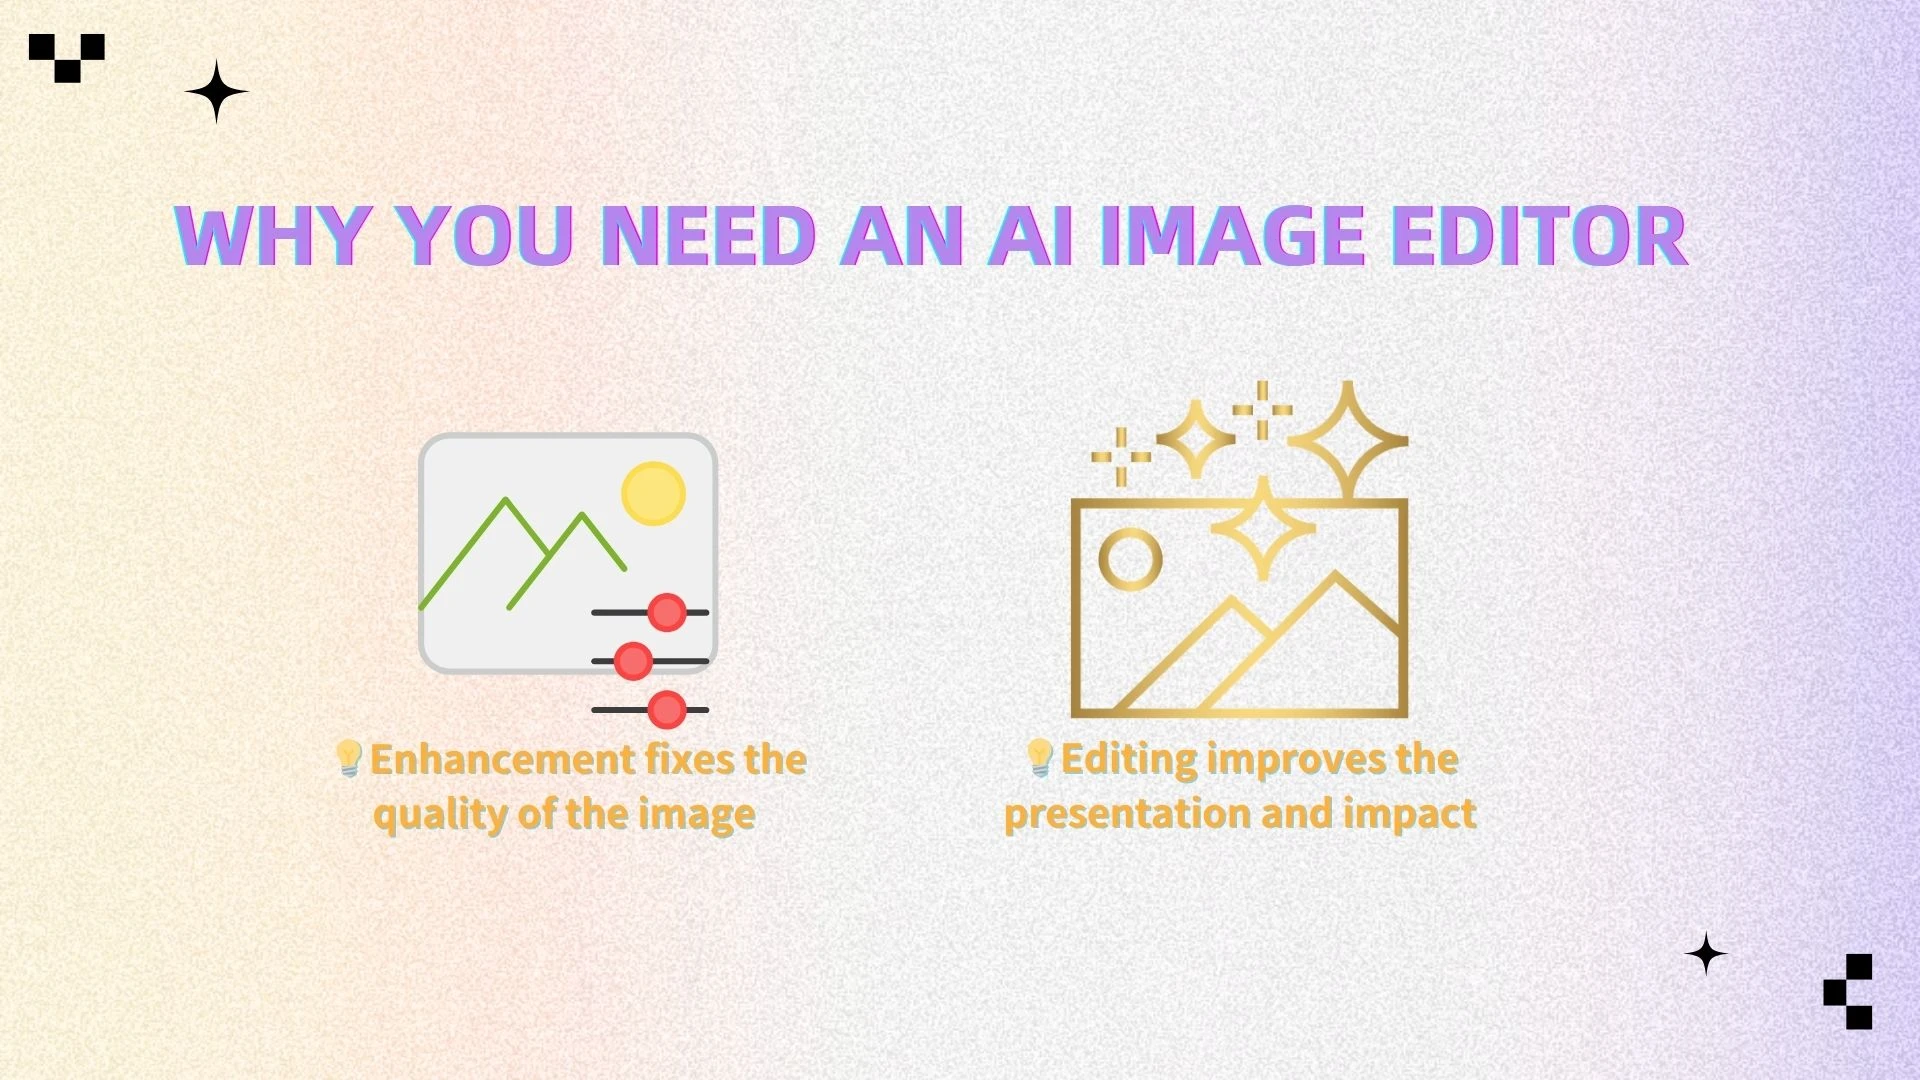
From Enhancement to Visual Perfection: Why You Need an AI Image Editor
While an AI photo enhancer significantly improves the technical quality of an image, clarity alone doesn’t always make a photo visually compelling.
After enhancement, you may notice new opportunities to refine the image further—perhaps the composition feels slightly off, the background is distracting, or the overall style doesn’t match your intended use.
This is where an AI image editor naturally comes into play.
Instead of treating enhancement and editing as separate processes, think of them as two stages of the same workflow:
Enhancement fixes the quality of the image
Editing improves the presentation and impact
An AI image editor builds on the improved clarity provided by the enhancer and gives you tools to shape the final look of your image.
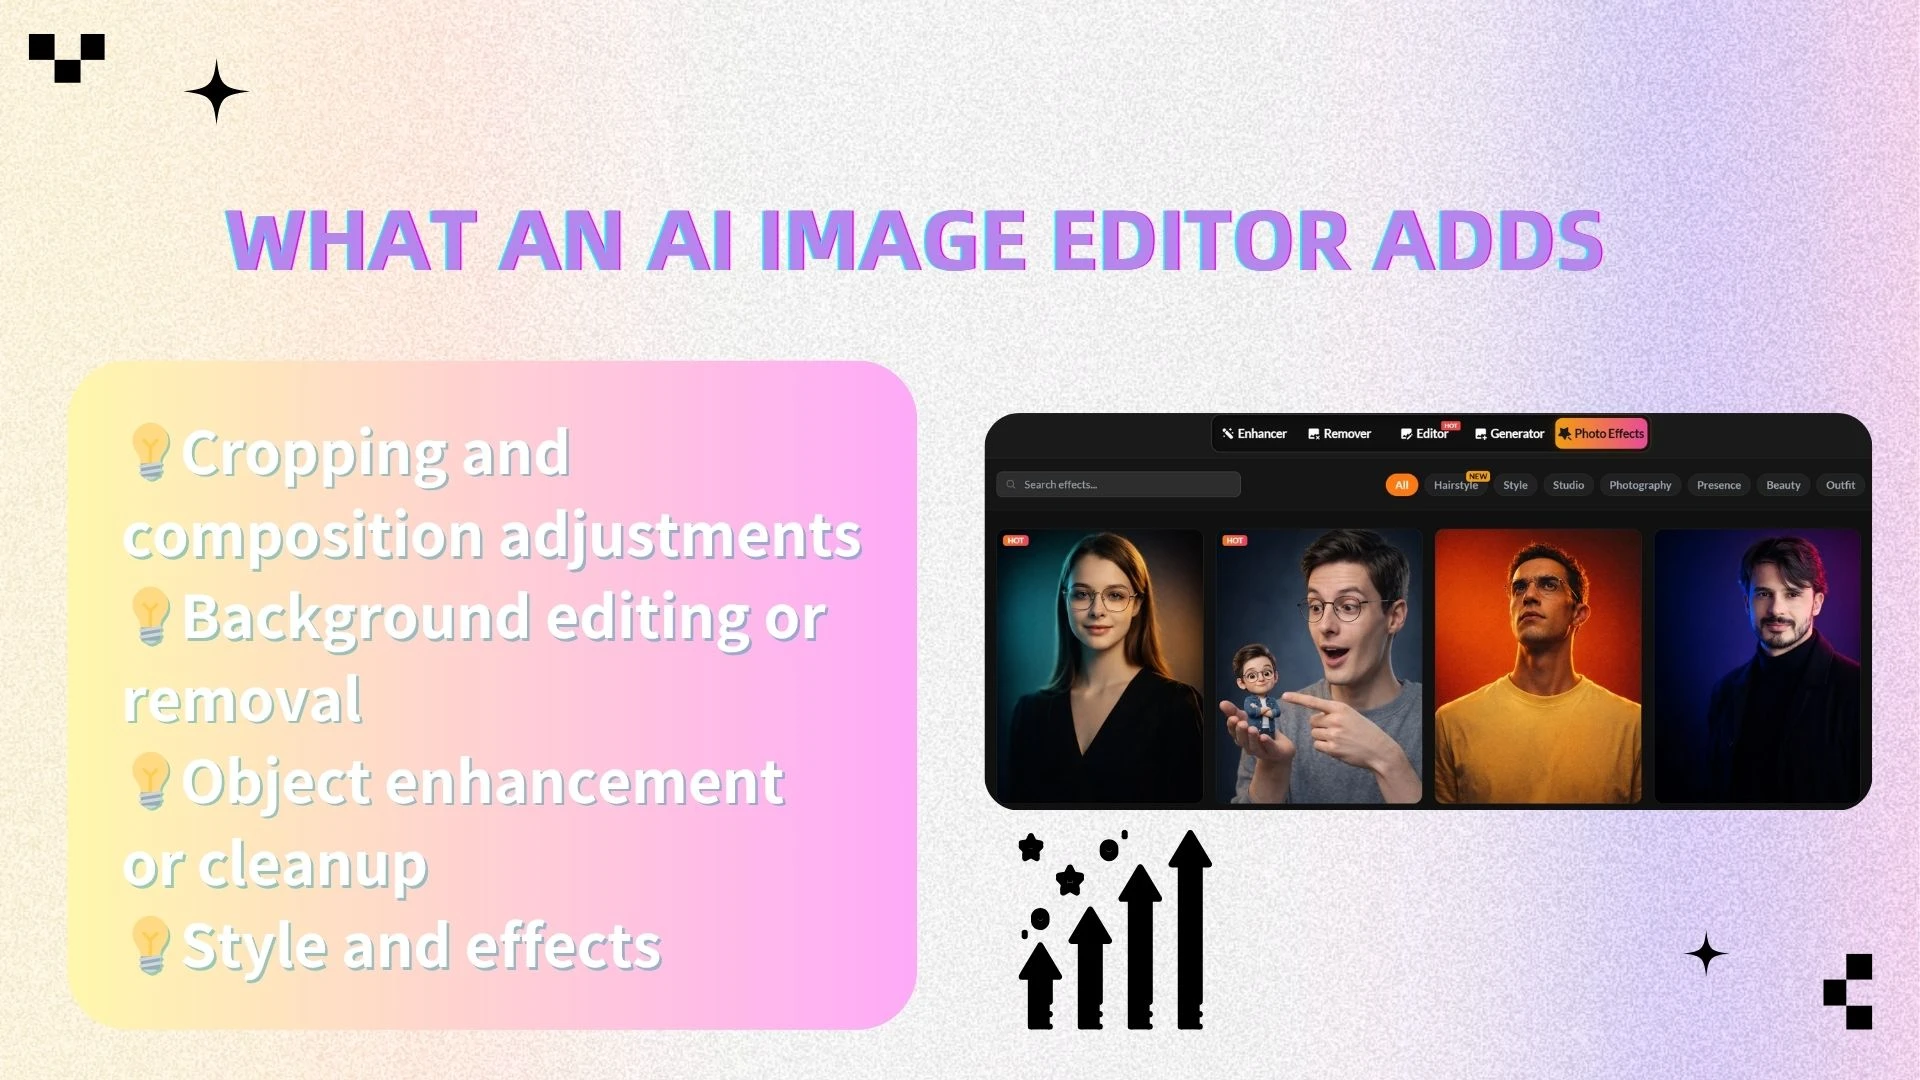
What an AI Image Editor Adds
Once your image is clear and detailed, an AI image editor helps you refine and elevate it further through:
Cropping and composition adjustments
Improve framing and focus attention on the subjectBackground editing or removal
Eliminate distractions or replace backgrounds for a cleaner lookObject enhancement or cleanup
Remove unwanted elements or refine specific areasStyle and effects
Apply visual styles, filters, or creative enhancements to match your brand, platform, or aesthetic
These tools are especially useful for social media content, marketing visuals, and product images where presentation matters just as much as clarity.
Summary
AI photo enhancement and AI image editing are not competing tools—they complement each other.
The AI photo enhancer restores clarity, detail, and resolution
The AI image editor refines composition, style, and visual appeal
When used together, they transform an ordinary image into a polished, professional-quality result that stands out in any context.
Improve Image Clarity with AIEnhancer
Improving image clarity used to require multiple tools, technical skills, and a significant time investment. With AIEnhancer, the entire process becomes streamlined and accessible—even if you have no prior editing experience.
Instead of manually adjusting dozens of sliders, you can follow a simple workflow where AI handles the complex parts for you. Below is a step-by-step guide to help you get the best possible results.
Step 1: Upload Your Image
Start by uploading your photo to the platform. It supports various formats and works directly in your browser.
Step 2: Enhance Image Clarity
Use the AI photo enhancer to improve resolution, reduce noise, and sharpen details. The AI handles everything automatically, giving you a cleaner, clearer image in seconds.
Step 3: Edit and Refine
Switch to the AI image editor to adjust composition, colors, or background, and apply effects. This step improves the overall look and visual impact.
Step 4: Download the Final Image
Once you’re satisfied with both the clarity and overall look, you can export your image in high resolution.
The final result is a polished, professional-quality photo that is ready for use—whether you’re sharing it online, using it in a project, or printing it.

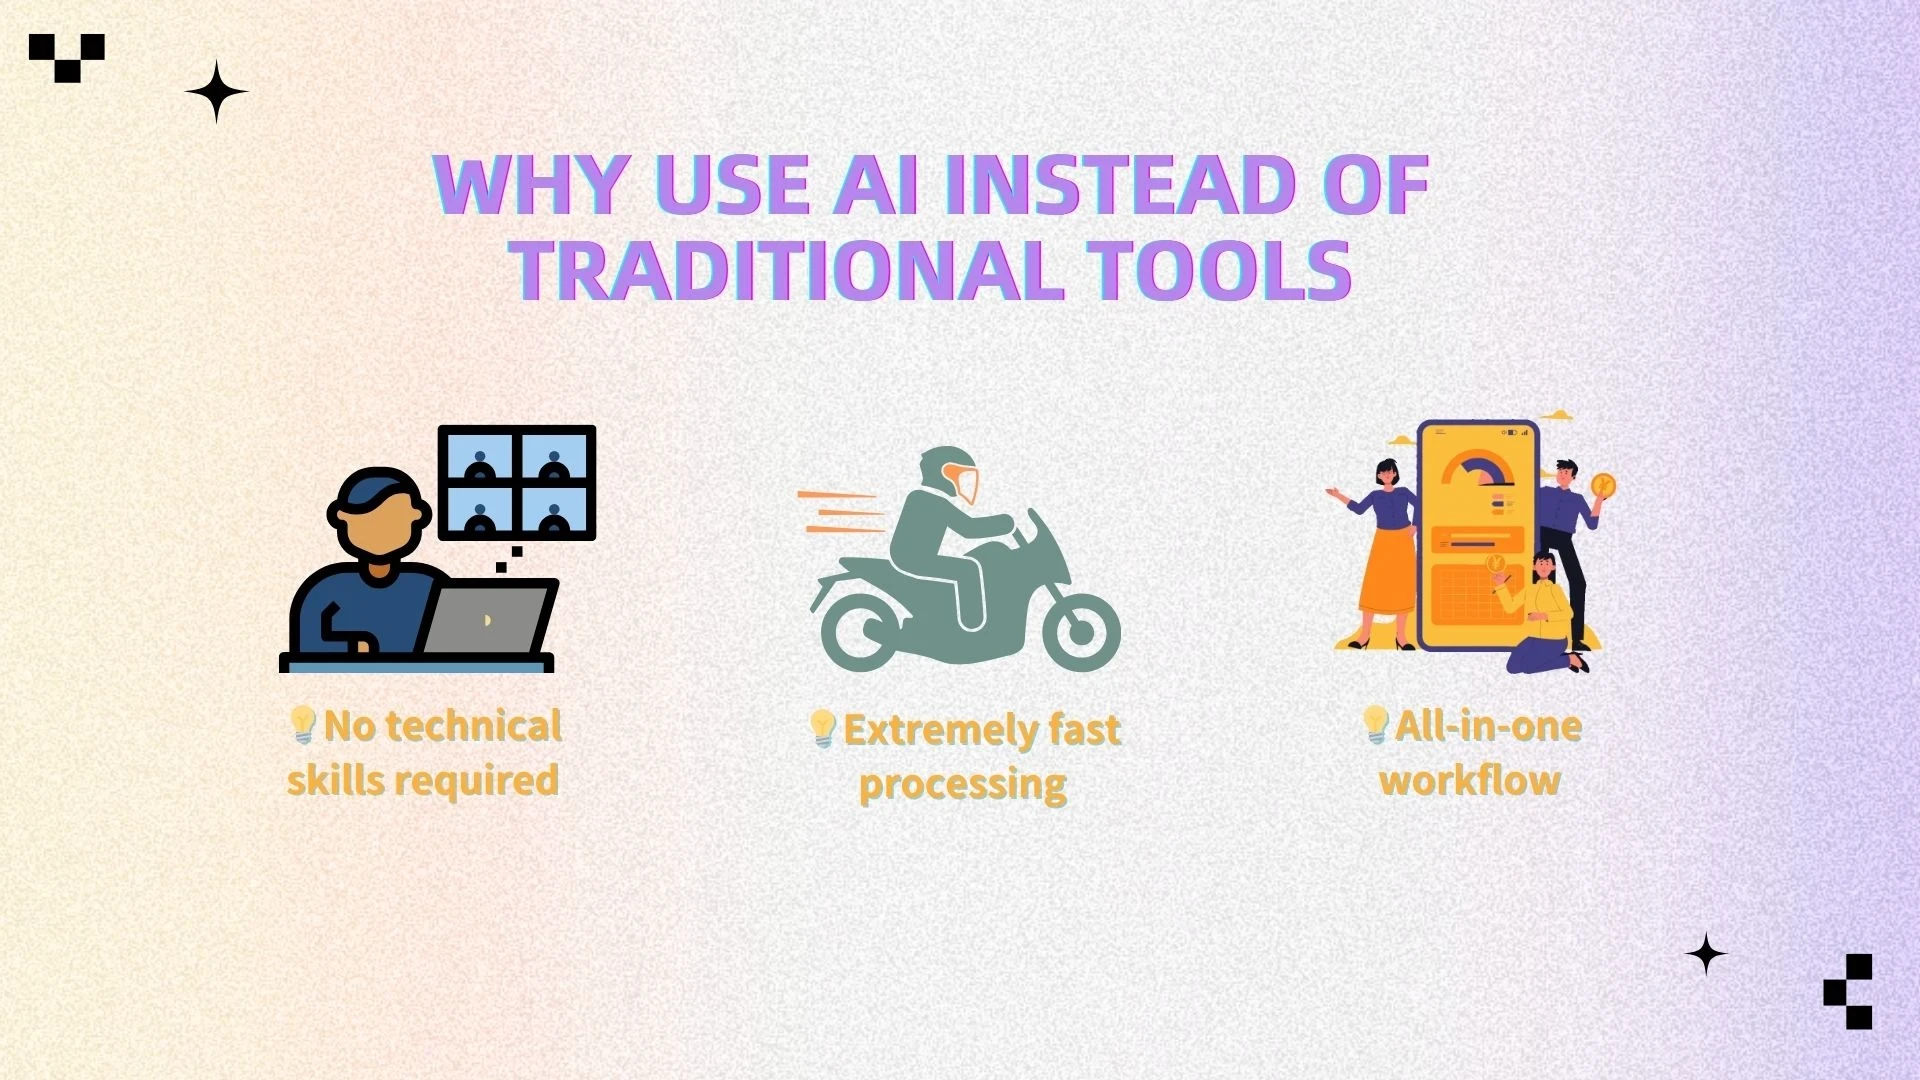
Why Use AI Instead of Traditional Tools?
AI-powered tools like AIEnhancer offer several clear advantages over traditional editing software:
Zero Learning Curve
You don’t need to understand complex editing concepts or spend time learning software. The AI handles the heavy lifting for you.Extremely fast processing
What used to take minutes—or even hours—can now be completed in seconds.All-in-one workflow
Instead of switching between multiple tools for enhancement and editing, everything is integrated into a single, seamless process.
This combination of speed, simplicity, and quality makes AI tools especially valuable for beginners and professionals alike.
Best Practices for Better Results
To get the most out of your AI photo enhancer and AI image editor, it’s important to follow a few practical guidelines:
Don’t Overdo It: Stick to 2x–4x Upscaling
Increasing resolution too aggressively can sometimes lead to unnatural results. Moderate scaling tends to produce the best balance between detail and realism.Enhance before editing
Always improve clarity first. Editing a low-quality image can amplify flaws, while editing after enhancement ensures cleaner results.Avoid overprocessing
It can be tempting to apply multiple effects or strong adjustments, but subtle changes usually look more natural and professional.Preview your results on different screens
This helps ensure that your image looks good across devices, from mobile phones to high-resolution monitors.
By following a clear, structured workflow—uploading your image, enhancing its clarity, refining its appearance, and exporting the final result—you can dramatically improve image quality with minimal effort.
With tools like AIEnhancer, what once required advanced skills can now be achieved in seconds, turning ordinary images into sharp, visually compelling content ready for any use.

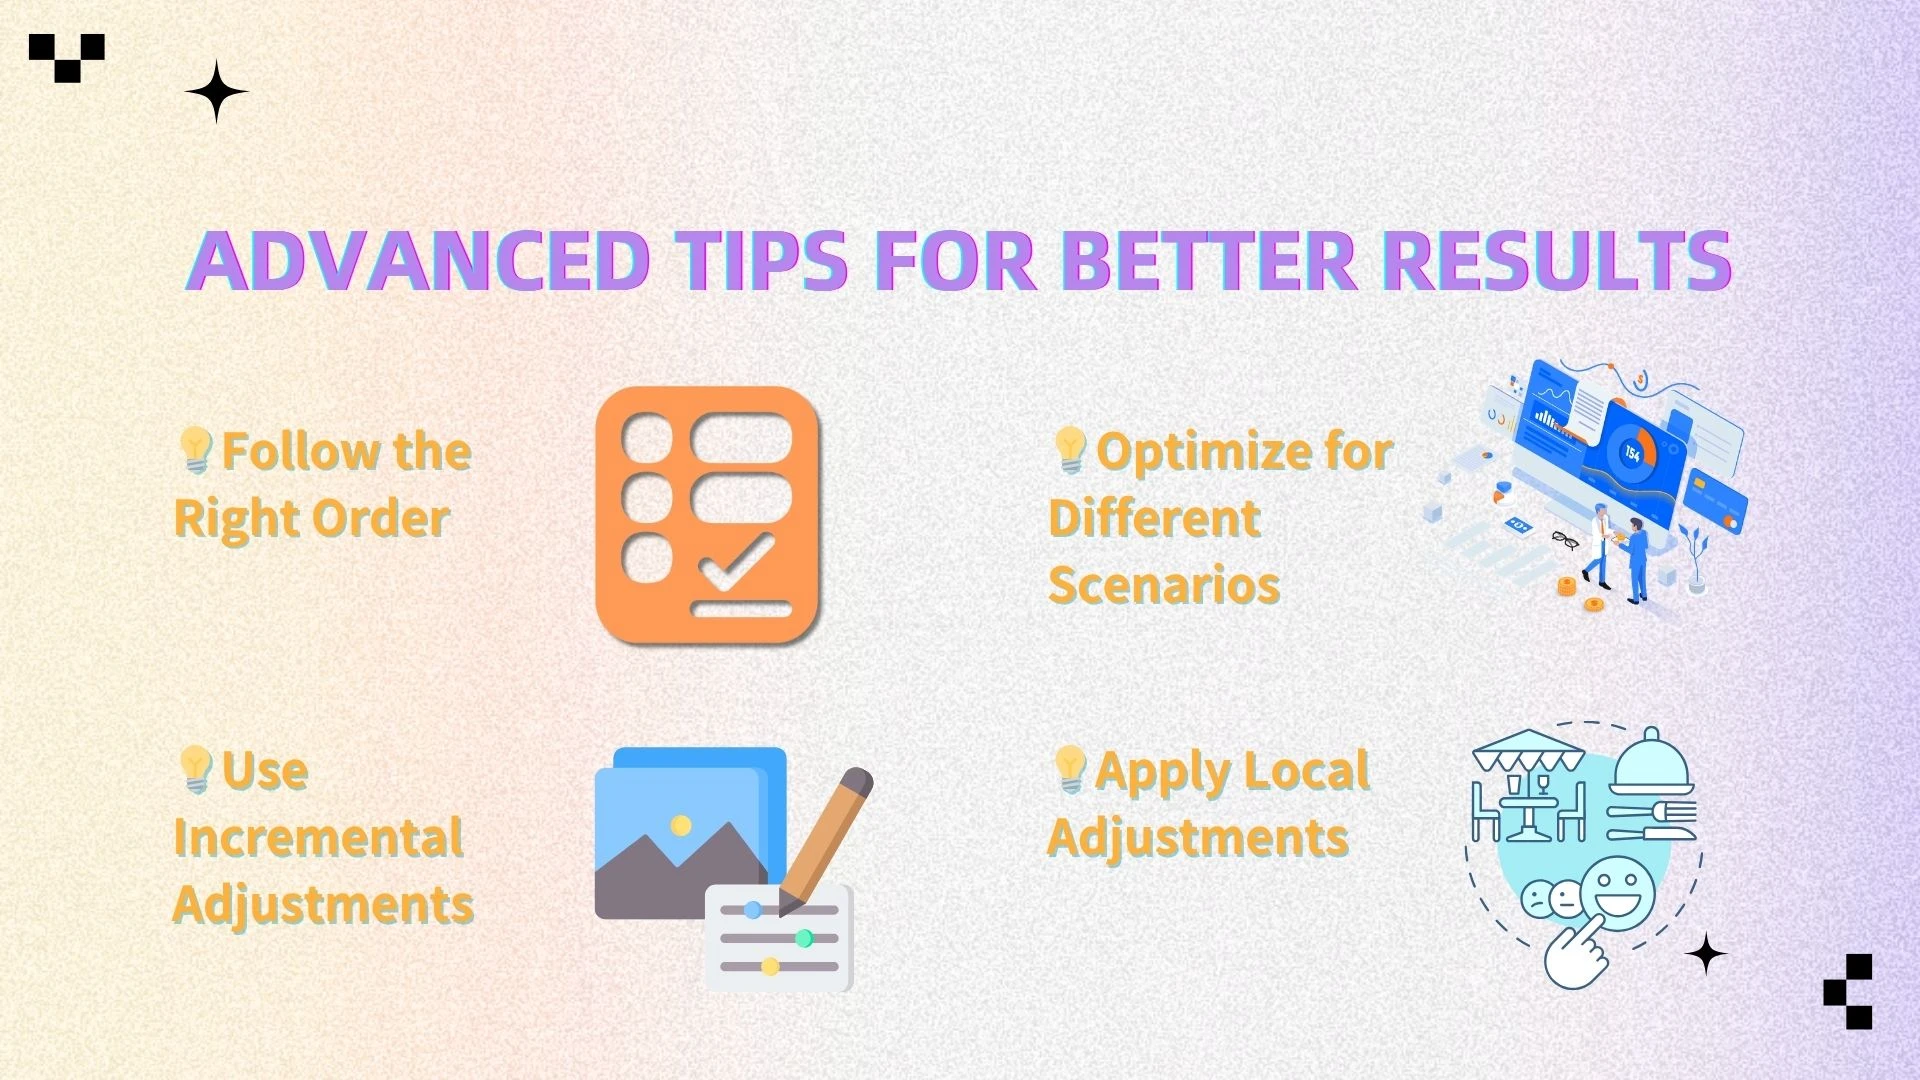
Advanced Tips for Better Results
If you want your images to look truly professional—not just clearer, but refined and visually balanced—then a few advanced techniques can make a noticeable difference.
AI tools handle most of the heavy lifting, but how you use them still affects the final result. By following the right workflow and making thoughtful adjustments, you can push your images from “good” to “high-end.”
Follow the Right Order
The order in which you process an image has a direct impact on quality.
A well-structured workflow ensures that each step builds on the previous one instead of amplifying existing flaws.
The recommended sequence is:
Denoise – Remove grain and unwanted artifacts first
Enhance details – Improve sharpness and resolution
Edit for style – Adjust colors, composition, and visual tone
If you skip or reorder these steps—for example, editing colors before fixing noise—you may end up exaggerating imperfections. Starting with a clean base always leads to more natural results.
Use Incremental Adjustments
One of the most common mistakes is applying overly strong enhancements in a single step. While AI can produce dramatic improvements, pushing everything to the maximum often creates unnatural textures or “overprocessed” images.
Instead, aim for gradual refinement. Apply moderate adjustments, review the result, and then fine-tune if needed.
This approach helps preserve realism, especially in areas like skin, textures, and lighting transitions. Subtle improvements layered together almost always look better than aggressive, one-click transformations.
Optimize for Different Scenarios
Not all images should be treated the same way. The “ideal” clarity depends heavily on the context and purpose of the image.
Portraits
Focus on maintaining natural skin texture. Over-sharpening can make faces look artificial, so balance clarity with softness.Product photos
Prioritize sharpness and detail. Clear edges and textures help highlight quality and make products more appealing, especially in e-commerce.Old or damaged photos
Combine restoration with enhancement. Reduce noise and repair damage first, then upscale to recover lost detail without introducing artifacts.
Adapting your approach based on the image type ensures more realistic and effective results.
Apply Local Adjustments
Global adjustments affect the entire image, but not all areas need the same level of enhancement. This is where local editing becomes valuable.
For example, you might want to:
Sharpen the subject while keeping the background slightly soft
Brighten a face without overexposing the rest of the image
Reduce noise in darker areas while preserving detail elsewhere
By treating different parts of the image separately, you can create a more balanced and natural look. This technique is especially useful for portraits, product shots, and complex scenes.
Final Insight
The key to professional-quality results isn’t just using an AI photo enhancer—it’s using it thoughtfully.
By following the correct order, making controlled adjustments, adapting to different scenarios, and refining specific areas, you can consistently produce images that look clean, natural, and visually compelling.
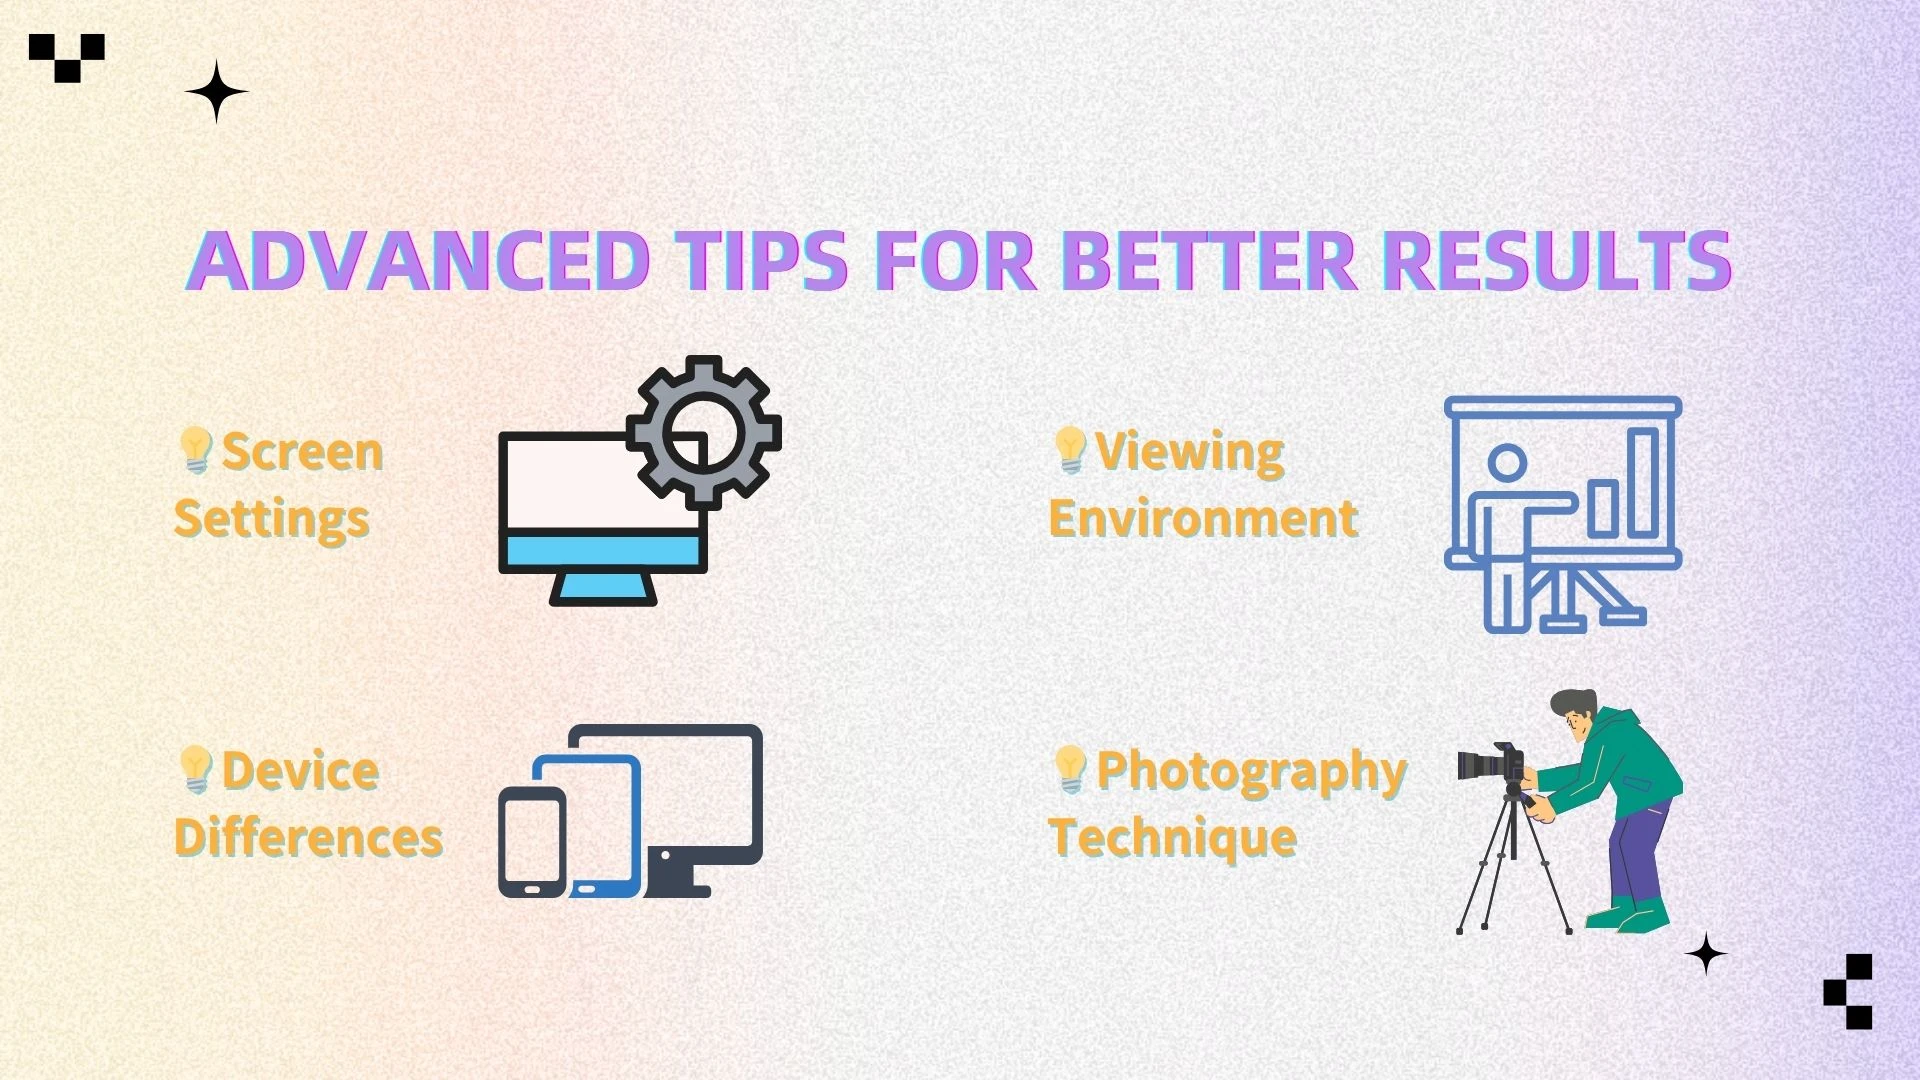
Factors That Affect Perceived Image Clarity
Even after using an AI photo enhancer, image clarity is not only determined by the file itself. External factors like screens, devices, and environment can significantly change how sharp or detailed an image appears. Understanding these variables helps you better judge and optimize your results.
Screen Settings
Screen brightness, contrast, and color calibration can dramatically affect perceived clarity. High brightness may wash out details, while excessive contrast can create artificial sharpness. For accurate evaluation, it’s best to view images on a properly calibrated display.
Device Differences
Different devices display images differently, especially when comparing standard screens with high-resolution displays like Retina or 4K. A photo that looks sharp on one screen may appear softer on another. Checking your image across multiple devices ensures more consistent visual quality.
Viewing Environment
Ambient lighting and reflections can influence how you perceive details and contrast. Bright environments may reduce visibility of fine textures, while dark settings can exaggerate contrast. Viewing images in neutral lighting conditions provides a more reliable assessment.
Photography Technique
The quality of the original image plays a crucial role in the final result. Photos taken with good lighting, proper focus, and stability contain more usable detail for AI enhancement. While AI can improve many flaws, strong source images will always produce the best outcomes.
Complete Image Clarity Workflow
Improving image clarity is most effective when approached as a structured process rather than random edits. Following a clear workflow ensures each step builds on the previous one and maximizes the quality of your final image.
Identify the problem – Carefully examine your photo to determine whether it suffers from low resolution, blur, noise, poor lighting, or color issues. Understanding the specific issues helps you choose the right enhancement strategies.
Use an AI photo enhancer – Apply AI tools to increase resolution, sharpen edges, reduce noise, and restore lost details. This step creates a solid, clear foundation for further visual refinement.
Use an AI image editor – Refine the image’s composition, color balance, and style. Adjust backgrounds, apply effects, and highlight key elements to make the image more visually compelling.
Optimize display settings – Review your enhanced image on calibrated screens under neutral lighting. This ensures colors, contrast, and sharpness appear consistently across devices and viewing environments.
By following this workflow, you can systematically transform any ordinary photo into a clear, professional-looking image suitable for online sharing, marketing, or printing.

Conclusion
Improving image clarity doesn’t have to be complicated. By breaking down the problem and using the right tools, anyone can achieve professional results.
AI-powered solutions like AIEnhancer make it possible to enhance, edit, and perfect your images in seconds. By combining an AI photo enhancer with a powerful AI image editor, you can significantly improve both technical quality and visual appeal.
If you want to improve image clarity quickly and effectively, now is the perfect time to start using AI tools. Upload your photo, enhance it, refine it, and see the difference for yourself.